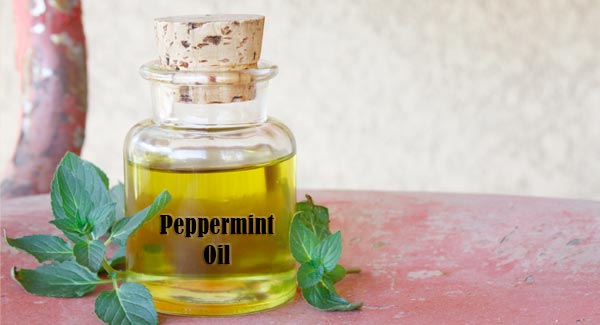
Homemade Peppermint Oil
Here's another oil that has come straight from my garden and into a jar.
You know these oils I'm infusing are turning out so nice and the people who are trying them are raving about them.
It makes me feels so good to know that others are enjoying my infused oils as much as I am.
So, peppermint among other things is said to be good for helping with hot flashes. This is just one of the reason why I've made this oil.
But you know what? I think it's really working. I just finished a body oil for hot flashes that seems to be working to. I'm lovin' it!
Peppermint oil is also said to help with headaches, muscle pain, repelling mosquitoes, itchy skin and just by smelling it, it can help with the symptoms of a cold and cough.
I know I'll be making some lip balm and salves out of this oil.
Making Your Peppermint Infused Oil
Just like the other recipes on Earth to Jamie that are about infusing oils, this is no different and it's just as easy.
Step 1 - Gather the Plant Material
Gather up all the plant material - I use the leaves and some of the stem. Before bringing them in the house I gently give them a little shake to help remove any dead leaves, etc.
Step 2 - Let Your Clippings Wilt
After bringing what I'm going to use in the house, I will lightly rinse them off and place them on a towel for the day and let them loose moisture and wilt a bit. If you are unsure, wait until the next morning to prepare your infusion.
Do not infuse your oil with plants that are wet or not dry enough, this could cause mold to grow in your infused oil and if this happens, you'll have to dump it out and start over.
Step 3 - Fill Your Jar with the Peppermint Clippings
When ready, place the plant material in your glass jar. The size jar you use will be dependent on how much infused oil you want.
Before placing the leaves in the jar I will bruise them a little by rubbing them lightly between my hands in a back and forth motion. Just to help release the scent before pouring the oil in.
Step 4 - Adding the Oil
After putting the plant material in the jar, fill it with the oil of your choice. Fill it just a bit over the plant material. Here is an article (this link will open in a new tab so you can easily get back to this article) and down around the middle it talks about different types of oils that you may want to use.
Step 5 - Seal the Jar and Find a Warm Place
Put an airtight lid on your jar and place it somewhere where it's warm. You can place it next to a warm kitchen window or the kitchen counter or similar.
Maybe even the shelf in a closet where sunlight is filtered in. I work from home and so I leave mine in the office where I know I won't forget about my oils.
I also leave mine sitting on a towel just in case of drips.
Step 6 - For 4 - 6 Weeks Give a Little Shake Each Day
Everyday you'll give the jar little shake or swirl or every other day is fine if you happen to forget. Nothing much, just enough to move the contents around. You will continue to do this for 4 to 6 weeks.
I will also (every now and again) use the handle of a mixing spoon to lightly smash the plant material (while in the oil).
I know, it's seems like a long time but it really isn't, you'll be happy with the end results.
Step 7 - Time to Strain the Oil
When it's time to strain the oil, place a piece of double layered cheesecloth over a funnel and slowly start pouring the oil through into a bowl.
When you get to the end of pouring the oil, grab up the cheesecloth with all the plant material in it and squeeze out as much of the oil as you can then discard the leaves, flowers, and stem pieces.
If necessary, use a new piece of cheesecloth and strain again to make sure all plant material is gone.
Step 8 - Using Your Infused Oil
Now you can pour your oil into a clean jar and use it as you will. Make sure to use an airtight lid, keep it stored in a cool place, and label the jar with the contents and the date.
Have fun with your oils.
Have you tried making this oil or do you have a favorite oil and plant material you like to infuse? Let us and our visitors know what you like.
Homemade Recipe Tips
- Make sure your work space and hands are clean.
- Make sure the containers you are using are clean.
- Make sure salves and creams have cooled enough before pouring in glass containers so they don't break.
- Keep the batch size small so the homemade products you use are fresh unless you're making gifts.
Infusing Herbal Oils
- Before you decide on which plant material you are going to use, I recommend you do your research on the plants or herbs you want to use.
- The infused oils I make are for topical use, I recommend you do a little test on your skin prior to using your infusion, just to make sure you don’t have a reaction, chances are pretty low that it would bother you, but you just never know especially if you have sensitive skin.
- All my infused oils have turned out great for the salves I’ve made or using them as they are or mixing with other oils and essential oils.


 Wellness Mama 5 Step Lifestyle Detox